
Why Fight?
The most common cause of a fight between a wolf and a competitor is over a carcass. In addition, wolf packs will fight to defend their territory against any encroachment.
A Dangerous Game
Fighting competitors is one of the most dangerous things a wolf can do, both in real life and in WolfQuest Anniversary Edition. Many predators have the capability to cripple or kill a wolf with only a few attacks. A wolf that picks needless fights with grizzly bears, cougars, and hostile wolf packs will not last long in the harsh wilderness of Yellowstone National Park.
When deciding whether or not to challenge a competitor, you must decide whether the reward is worth the risk. If you have a full belly, perhaps challenging a cougar for that elk carcass isn't your best option. But if you are on the edge of starvation, and that elk carcass is the only food around, trying to intimidate that cougar into flight might be your only choice.
If you are unable to force a competitor into flight, and choose to fight them directly, always keep an eye on your health and stamina.
Both prey and competitors have a number of bite points, each with different characteristics. Different bites have different levels of effectiveness.
Neck holds do the most damage, but are often hard to pull off if your opponent doesn't cooperate.
Flank holds do the least damage, but are easier to achieve and less reliant on the facing of your opponent. They are also more safe than a leg hold.
Leg holds are less damaging than neck holds, but the easiest to achieve if your competitor is running from you. However, if they are already running, you may not need to chase them.
Few predators will return after deciding to flee.
HINT: the damage you do and the damage you take is randomized at the beginning of the bite and doesn't change (except for effects from changing health). This means you might want to release a bite early if the numbers look bad and try again. But keep in mind, every new bite costs extra energy.
If a fight is going poorly for you, run! There's no shame in living to fight another day.
The Basics
Fighting other animals is similar to hunting prey, and many of the tips that apply to hunting are relevant to fighting. Consult the article on hunting here for additional information. The first part of fighting you must master is the Fight or Flight meter.
Fight or Flight
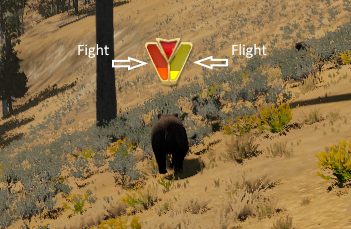
This is the Fight or Flight meter. The left bar, depicted in orange, represents the competitor's willingness to fight. If it fills up, the competitor may launch an attack against you. In addition, when the Fight bar is full, the Flight bar will not rise. Different actions may affect the Fight bar, including getting too close to a competitor, ignoring it to take a bite of a carcass, and, depending on the competitor, attacking it directly.
The right bar, depicted in yellow, represents the competitor's desire to flee. If it fills up, the competitor will flee. Taking aggressive actions like growling and other emotes may increase the Flight bar, but be careful! These actions may also increase the Fight bar, making the competitor more aggressive.
Different competitors spook more easily. Smaller animals like foxes will flee quickly, whereas packs of stranger wolves or the fearsome grizzly bear can be very difficult to scare off.
When attempting to scare a competitor away, taking your time with threat displays like growling and snarling is often a good strategy. Actions like growling can provoke a temporary rise in the Fight bar, but a permanent increase in the Flight bar. Allowing time for the Fight bar to return to a lower state before threatening the competitor again may increase your chances of driving them off.
Biting (attacking)
The red BITE icon (jaws) appears when you are close enough to attack an animal.
Press-hold SPACEBAR to attack and bite it, holding on until you release.
Animals have more than one bite target (red dots, when targeted). Different bite locations do different amounts of damage and have different levels of risk to you (see above).
To break free from another animal's bite: tap left/right movement keys (A/D on keyboard, left stick on controller) rapidly to break free.
Fighting With Your Mate's Help
Similar to hunting, your mate can make a valuable ally in any tussles you may find yourself in. Having additional wolves nearby will increase the chance that your competitors will flee the scene, as two wolves are scarier than one. This can help you avoid fights over carcasses, as well as make entering stranger wolf territory less hazardous, though only slightly.
If you do get into a fight, your mate will fight with you, though their behavior will depend on their personality. Some mates may rush into the action, creating openings for you to support them. Others may hang back, wary to risk themselves in the fight until you commit to it. Whatever your mate's personality, working with them during a fight will rely on your ability not only to predict your mate, but to synergize with their fighting style.
Fighting Packs
While some competitors like grizzly bears and cougars are solo operators, others, like coyotes and stranger wolves, usually move in groups. Fighting groups requires different tactics than fighting individuals. If you are outnumbered, flight is often the better choice. Fighting multiple enemies at once is difficult, as each bite against you will disrupt any bite-hold you are attempting.
If you choose to fight multiple opponents, such as coyotes, attempt to separate them from each other before attacking. You can do this by chasing one opponent for a short period of time in the hopes that its allies will fall behind, or, if you are the one being chased, by weaving through obstacles to disrupt their formation. Much like when hunting elk calves, isolating your quarry is paramount to a successful fight against multiple opponents.
HINT: Press the left and right movement inputs (A and D keys or left thumbstick on controller) when you are being bitten by a wolf will help you escape more quickly, and take less damage!
Stranger Territory
Large swathes of land in Amethyst Mountain and other maps belong to rival wolf packs.
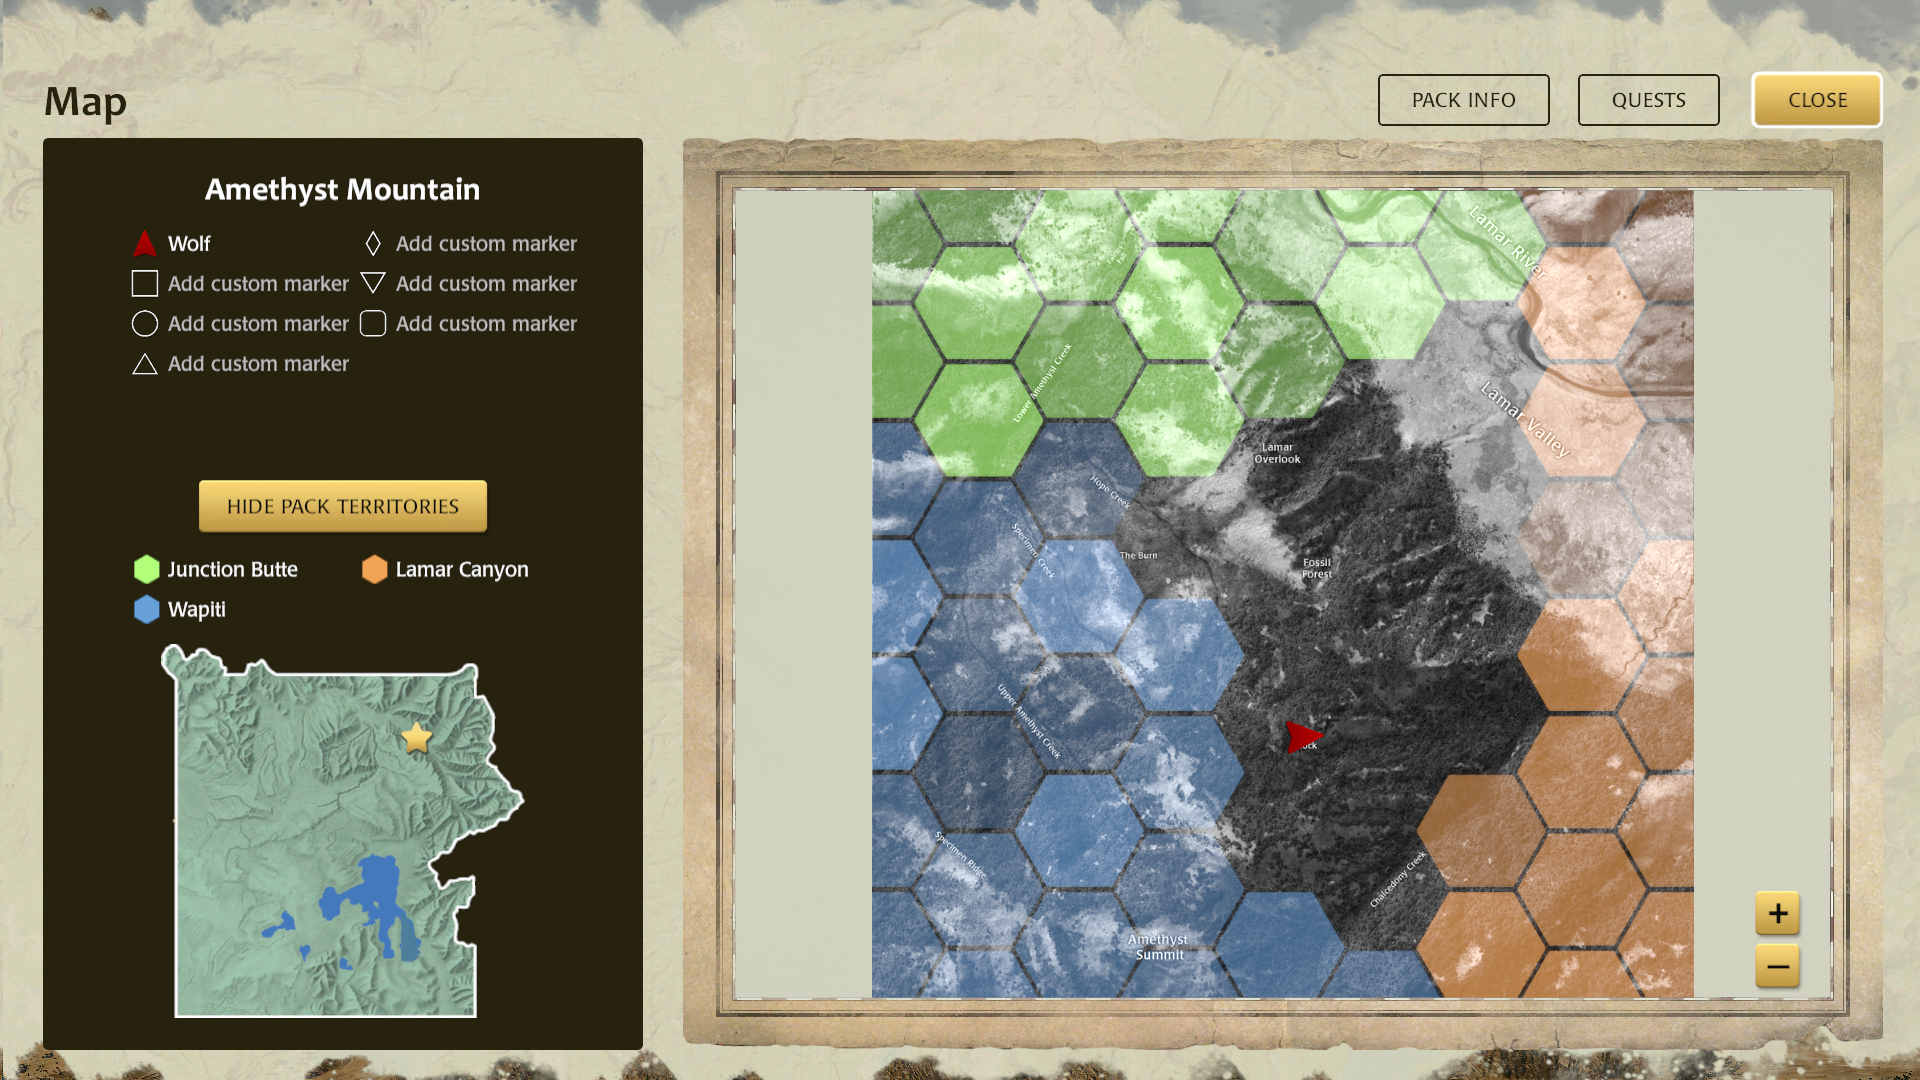
The shaded hexes represent the territories of the different wolf packs, and the blank hexes are unclaimed territory. If you stray into the territory of another pack, members of that pack may arrive to defend their territory. The deeper in you go, the more likely it will be for you to be discovered. Note that while packs will aggressively defend their territory, they will not follow you once you've left their territory. If you end up deep in pack territory, head for the unclaimed hexes on the map.
The Competition
You can learn more about the competitors you will face in WolfQuest: Anniversary Edition here: http://www.wolfquest.org/wolfopedia/competitors
VIDEOS about FIGHTING TIPS & GAMEPLAY
Fighting Tips and Tactics (JayPlays)
We asked JayPlays, a popular YouTuber and longtime WolfQuest player and beta tester, to suggest some tips and tactics to help players fight competitors more successfully. She demonstrates different aspects of fighting strategy, from how to evaluate the risk of a fight to the best ways to emerge victorious. She delves into the nuances of the different competitors, highlighting their behaviors and the best ways to handle each animal.